
Don’t Repot Your Snake Plant Until You Discover This Hidden Secret!
Are you ready to unlock the mysterious world of snake plants? This resilient plant, known for its striking leaves and air-purifying qualities, is a favorite among houseplant enthusiasts. But before you reach for the soil and pot, let’s talk about the one crucial step you need to take before repotting your snake plant, a step that could make or break your plant’s health!
The Common Struggle with Snake Plants
Many plant lovers face a common dilemma: when is the right time to repot a snake plant? The truth is, repotting too soon or too late can lead to stunted growth, root rot, or even death. Plus, the fear of damaging such a forgiving plant can be overwhelming. With all the conflicting advice out there, it’s no wonder you feel unsure!
Why Normal Methods May Fail
It’s easy to fall into the trap of following generic advice that doesn’t apply specifically to your plant. Understanding your snake plant’s unique needs is crucial. For instance, repotting without a specific technique can disrupt the roots, making it harder for your plant to thrive. That’s right—you could be harming your precious green companion when all you want is to help it flourish!
Unveiling the Secret to Successful Repotting
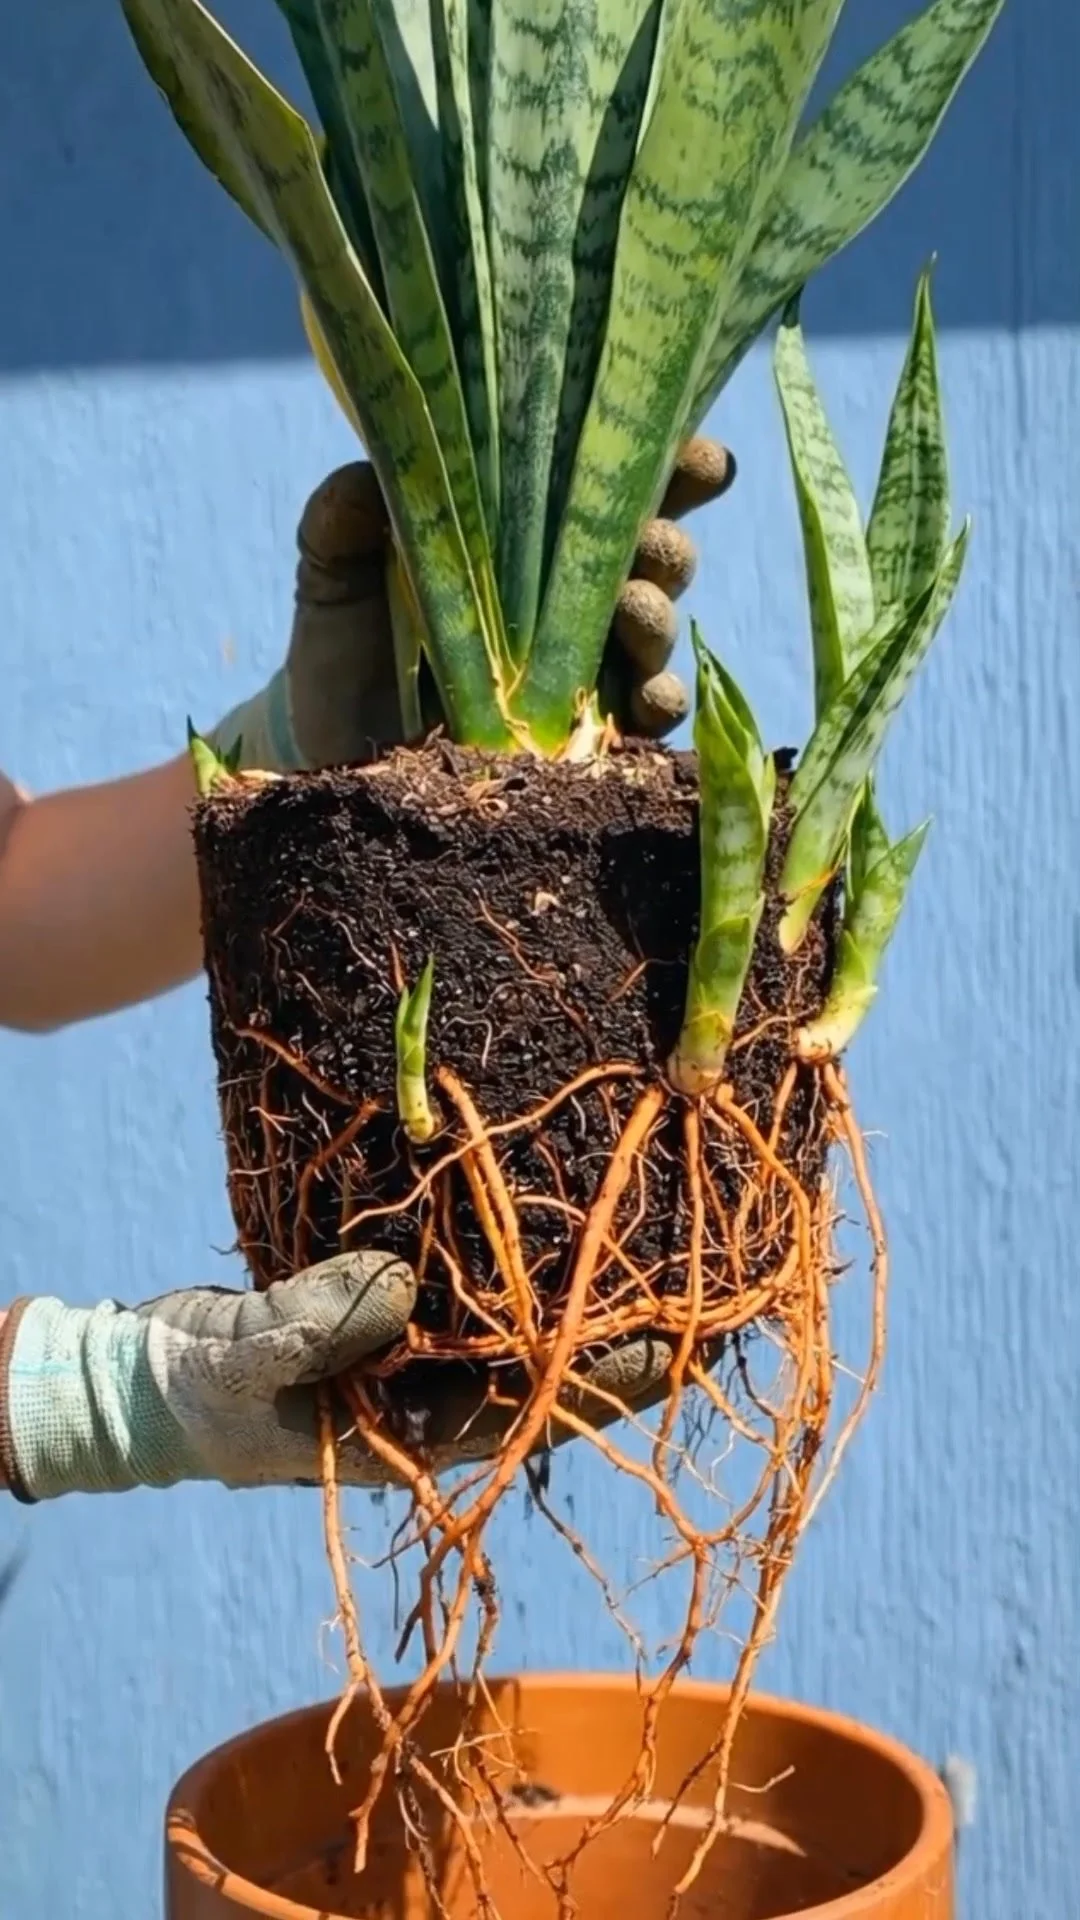
Here’s the golden rule: Don’t repot your snake plant until you see these signs.
- Root Bound: When you notice roots emerging from the drainage holes or circling around the pot, it’s time for a new home.
- Health Decline: If your plant shows signs of poor growth or wilting despite proper care, it may need more space.
- Soil Degradation: After a year or two, the original potting soil can break down and become ineffective. If your plant is still in its nursery pot, it’s a sure sign!
Step-by-Step Guide to Repotting Your Snake Plant
Ready to give your snake plant the upgrade it deserves? Follow this simple guide:
-
Gather Your Supplies:
- A new pot (1-2 inches larger in diameter)
- Fresh cactus or succulent soil
- Scissors or a sharp knife
- Water
-
Prepare Your Snake Plant:
- Water your plant a few days before repotting. This helps the soil clump together and minimizes root damage.
- Carefully remove the plant from its current pot. You may need to gently squeeze the pot to loosen the soil.
-
Examine the Roots:
- Inspect the roots for any signs of rot (brown, mushy roots). Trim away any dead or damaged roots with clean scissors.
-
Transfer to the New Pot:
- Fill the new pot with a layer of fresh soil. Place your snake plant in the center and fill around it with soil.
- Press gently but firmly to eliminate air pockets.
-
Water Sparingly:
- Water lightly to help settle the soil but avoid soaking it. Allow it to dry before the next watering.
What Results Can You Expect?
After following this guide, you can look forward to a thriving, vibrant snake plant bursting with life! By ensuring it’s the right time to repot, you’re paving the way for healthier growth and more beautiful foliage.
Extra Useful Tips for Your Snake Plant
- Lighting: While snake plants are tolerant, they prefer indirect sunlight. Too much direct sun can scorch the leaves!
- Fertilizing: Feed your snake plant a diluted, balanced fertilizer during the growing season for optimal growth.
- Avoid Overwatering: This is a common mistake. Stick to the “drench and dry” method—water thoroughly, then wait until the soil is completely dry before watering again.
Conclusion
Now that you’re equipped with this hidden secret, you can tackle your snake plant repotting with confidence! Remember, waiting for the right signs can transform your plant into a lush, thriving oasis in your home. Celebrate your progress, and don’t be afraid to share your success with fellow plant lovers! Happy planting! 🌱